Banoffee Muffins

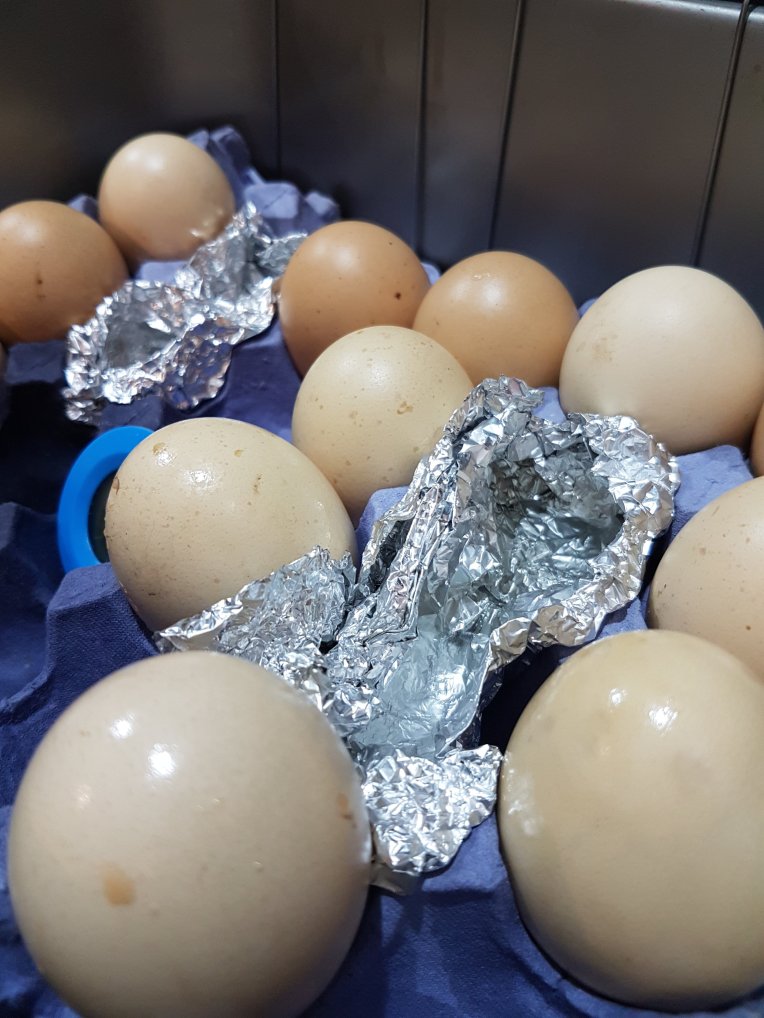
These disappeared so quickly I didn’t catch a picture first time round (and the only one I got was pretty pants). I think it was a family ploy so I had to make a second round… I’m on to you guys!

Plus, the toddler is well and truly in the “cake for all meals” phase. So more healthy treats round the house required (that look naughtier than they are).

Seriously though, these went down a treat. Think the proof is in the lack of pictures! Ha!

Makes 12

Ingredients

  • 3 cups rolled oats
  • 2tsp baking powder
  • 1tsp cinnamon
  • 1/2tsp salt
  • 2 eggs
  • 1 1/2 cups salted caramel almond milk
  • 1/2 cup chocolate chips

Method

  1. Preheat oven to 180 degrees or 160 if fan forced.
  2. Slice banana if only to feed the child a bit while you mash the rest…
  3. Mix all dry ingredients (or let the child do it if you have time to kill washing up the whole kitchen and some of the dining room.
  4. Mix the eggs and milk into the bananas well.
  5. Pry child off the bowl (or move to one side, briefly) to pour banana mush into dry mix mush and mix.
  6. Pour into pre-greased muffin tray and pop into the oven for 20 to 25 minutes.
  7. Find another banana because the child did not eat enough of the slices and requires one more bite of a full banana. Of course.
  8. While cooking, sprinkle chocolate chips on top.
  9. Hide some if you actually want to try them yourself!

Honestly The Best, Worst Pudding, Ever.

So, I’ve been a little quiet on the old baking front. I’ve switched around a few things, pulled up my big girl socks and stepped up the level of organisation at home. Across many levels.

Projects are being completed, we have a clear budget with short term (and long term) goals and we are working better as a team to get shit done.

Lovely and all, but what about baking? Ok, ok. So with the new budget came cut backs on treats. This means no lavish or excessive caking. True story.

So, in true form, I invited friends over for dinner (who couldn’t make it, in the end), purely to have an excuse to male this beast I’d seen roaming around on Facebook.

(Apologies, I can’t remember who shared it originally).

Time: Took 1 hour in my slow cooker, on low. Mine tends to run a little warmer now she’s in her twilight years but it’s always worth checking. Not going to judge if you need to check multiple times (yumyumyum)!

Ingredients:

  • Chocolate cake mix (Edmonton were on sale so I got the super moist and generally naughtiest looking one)
  • Chocolate mousse sachet (I had a Greggs one hanging around)
  • One large block of your favourite chocolate (currently obsessed with Cadbury’s Moro bar)

Instructions:

  1. Make up the cake mix as per packet instructions. Right up to the ‘put it in the oven’ part.
  2. Shake toddler loose from leg and bribe with apple. This will only work for five minutes as this is how long it took mine to realise I was working with chocolate…
  3. Instead of the oven, pop into your slow cooker and smooth a little so you have a sticky spoon to, erm, clean…
  4. Prepare chocolate mousse as per packet suggestions. Put a tiny bit in a tiny bowl for tiny child who won’t let up now she smells chocolate and waiting minutes to lick the bowl ain’t gonna cut it.
  5. Gently pour the remainder of mousse over the cake mixture. Don’t stir it. Leave it in a dirty little puddle.
  6. Break up your beloved block of chocolate and delicately place on top of the mixture. Avoid the sides unless you have a hydraulic attachment in your dishwasher to chip off welded chocolate. If your slow cooker is oval shaped, like mine, it’s accepted not all the chocolate chunks will fit (count them below) so, dispose of the excess as you see fit.
  7. Pop the lid on the slow cooker and amuse the toddler for an hour.

Homestead Additions

It’s time for a good old catch up. Winter is well and truly here and we are enjoying somewhat of a respite from insane amounts of weeding. So, planning and plotting have taken over most waking (and some sleeping) hours.

New arrivals

We have four new ladies in situ; Dusty, Freckles, Speck and Spock.

Absolutely gorgeous ladies and instantly very happy in their new homes. We made a raised nesting box for them, which they use for laying (3 a day so far) but like to sleep on top huddled together.

They free range during the day and have figured out how to skip into the next paddock. Jon Cat seems intrigued but from a distance

Ali BaaBaa has also joined the brood. Formally one of my friend’s lamb and now our wee buddy. How fluffy?

Formal Gardens

We’re taking the opportunity to reorganize the garden a little and create areas as we go.

The driveway is going to get a top up soon so I thought I’d neaten the edges. We’ve got some simple hedging in as dual purpose: create a neat edge and start the area development for a contained grassy area for the kid.

Still to do

Still need to dig over the veggie patch and move some more flowers around…!

Not That Disastrous Quick Cookie

So, I adore the playgroups we attend. Fellow parents and their children are wonderful and kind faces, absolutely needed when living (seemingly) in the middle of a few fields where your main conversations, other than with your toddler, are with wildlife and probably yourself. It’s a welcome relief to see and hear other grown ups in a similar position to yourself.

Imagine my glee when I popped my name down on the Rota to bake! When I signed up, I was full of sass/confidence/cockiness and raring to go with some genius baking.

When the day came (or the night before), I was very low on energy, the child had had a whine at every opportunity and we had a power cut half way through. Challenge upon glorious challenge.

On top of that, I’d also experienced the baking of others and, my goodness, we have some undercover Nigellas in our group! Nevertheless, she carried on and made good on a promise.

Chocolate chip (button) cookies

Time to make pending natural disasters, demanding toddler and energy levels. Took me 2 hours, should probably only take 30 minutes.

Ingredients

  • 200g room temp butter
  • 1 cup brown sugar
  • 1 cup white sugar
  • 2 large eggs
  • 3 cups flour
  • 1 tsp vanilla
  • 1 tsp baking powder
  • 2 cups (alleged) chocolate chips

Method

  1. Preheat oven to 160 fan bake/180 non fancy fan
  2. Throw butter and sugars in a bowl and beat out all the frustrations of the day with what energy you have.
  3. Throw one egg on the floor because your child snuck up on you and this is evidently the best response. See if you have another egg to replace. Debate clean up now or later.
  4. Crack the two eggs into the mixture and stir in. Throw in the vanilla while we’re here.
  5. Fold in the flour and baking powder cup by cup. Taking care not to drop too much on the child circling your ankles. Once it’s wet (because if you didn’t clean the egg up, that’s getting mixed into the hair and on all the cupboards), it’s a pain to clean.
  6. Find the bag of chocolate bought earlier in a rush and realise you’ve bought buttons instead of chips.
  7. Swear a little under your breath.
  8. Attempt smashing them to make them appear like chips.
  9. Realise this is somewhat futile. Throw in the half smashed buttons and hope for the best. Eat a handful for therapeutic value.
  10. Roll into small balls around the size of your palm and pop on the baking tray. Press with a fork (remember, we’re fancy now) and put in the oven for around 12 to 15 minutes.
  11. Allow to cool on a rack and pray to the gods of baking no-one realises it’s buttons in there. Or if they do, that it was intentional.

Donut Day!

So it took a couple of tries to get this one right, mainly thanks to my ridiculous over heating of the oil first time round. Apparently charcoal donuts were not what was requested. Hey ho.

Anyway, super simple and now frequently requested (urgh, what have I done?), donut holes! Because who has time for faffing with filling with a toddler trying to jump in the oil?

Takes 20 mins from start to finish if you put Harry Potter on while you work…

Ingredients

  • 2 cups plain flour
  • 1 tsp baking powder
  • 3 tbsp brown sugar
  • 1/2 cup butter
  • 3/4 cup milk (We have salted caramel almond milk FTW)
  • Veggie oil for frying
  • Brown sugar/cinammon/icing sugar for topping

Method

  1. Warm your oil. Not to the temperature of the sun else your house will smell like a chip pan fire for all eternity. I worked out that medium temperature is just fine.
  2. Mix in all ingredients apart from milk. If you do it in the processor it makes life 20 times easier and the noise scared the child away long enough to remember Harry Potter is on.
  3. Slowly add the milk and wait for the magic dough consistency.
  4. Scoop out mixture onto a floured side and kneed a bit. Nothing fancy if your toddler has now decided the processor is actually not that scary as she’ll want to eat it now she’s seen it.
  5. Bribe with a banana.
  6. Section off bits of dough around the size of the palm of your toddlers hand and roll into a ball.
  7. Pop into your hot (not blinding sun hot) oil 3 or 4 at a time to give you chance to roll and catch the blighters before they dissolve into a crisp.
  8. Scoop out of oil with appropriate slotted spoon and rest on sheets of kitchen roll.
  9. While warm, roll in a mixture of brown sugar and cinnamon or dust lightly with icing sugar.
  10. Devour half as hubby puts child to bed and claim fire damage.

Enjo – Chemical Free, Effective Cleaning

Just so we are clear, this isn’t a sponsored post. I was offered a free trial by a good friend and the expectation was for some simple (probably just verbal) feedback. However, that just wouldn’t do it justice and I wanted to truly express my sheer joy at being introduced to this system.

1. It is actual chemical free.

I have an adventurous toddler in the house. She likes to eat, lick and roll around in whatever is found around the home. As they all do.

No matter how good you think your childproofing is, they will find a way to undo your hard work. Locks on the kitchen cupboard doors were pulled off. Squishy corners on tables were picked and flicked. Hidden things are no longer a thing. There is nowhere sacred in this house.

So. This system seems to have already gotten off to a great start; not only can my child walk on the surface straight after cleaning…she can bloody well help doing it with her own child sized mitt of her own! Genius.

2. Simple. Simple. Simple.

I swear, like most Mums, I get ADHD when cleaning. I’m cleaning the kitchen then all of a sudden I’m in the laundry and I’m trying to keep it together long enough to finish just one cleaning task. Sound familiar?

With this, it genuinely doesn’t matter if you jump from surface to surface. The fibres pick up everything and hold onto them until they are washed. I can clear up the buttered toast smears on my kitchen surface, left by the child, and go straight to cleaning the window when I’ve noticed she’s casually left more butter there. No streaks, no mess spreading, just two clean areas.

3. It suits my decluttering goals

Moving house more than once really pushes you to think about stuff. Literally stuff and why do you need all of it. I’m attached to a lot of things in my house but I yearn for that beautiful, elegant, instaspam minimalism. It ain’t happening with a child in the house but a girl can dream and a Mum Boss can still chip away in the background until the nest have been flown from.

So. Before Enjo I had a typical cleaning cupboard. Window cleaner, bathroom cleaner, oven stuff (with hazmat suit), ceramic hob stuff, floor stuff….the list goes on and on. As I’m sure most people’s do.

Now, you need maybe 5 items maximum for the whole of the kitchen; floor, surfaces, oven, windows, hob….glorious cupboard space!

Homestead Update: Winter is Coming

I’ve been due an update on the old homestead for a few weeks. It’s been a whirlwind of lots of little jobs ticked off the list while other small, neglected, jobs are getting bigger! Hmmm. Balance may be needed.

So, a job that has been irking me since we moved in is the woodshed. We brought our own wood and added to the small pile that was already there. It was just a mess in there and there was no way anything other than an accident was bound to happen in there.

Anyway. Took me all most of the day afternoon to just get the stuff organised enough to then move the freshly chopped wood into another section to dry out for next winter. I also need to split a lot of that wood and I wasn’t going to start that in the dark!

(Hashtag should have started earlier in the day, yeah yeah).

Next up was a tonne of baking and organising food for 20 to 30 hungry Buddhists and an opportunity to try out new things. No idea why I thought new things to try on the eve of an important event would be such a good idea but I did it anyway.

  • Scones
  • Pasta salad
  • Cupcakes
  • Cookies

As you do.

Finally, no news yet on the eggs…I’m now wondering if they’re not meant to be. We are nearly at the three week mark and been pretty consistent with temperature and humidity, pumping a little extra humidity in more recently.

Feijoa scones…. I’m kidding. We’re on a Break.

Like a Rachel and Ross break. They’ll be back next week. I’m just about to cater for 30ish hungry Buddhists so thought I’d try my hand at scones!

Sacrilege really, British and now living in New Zealand for four years and I’ve never put too much thought into scones. So, why not give it a whirl?

What could possibly go wrong…?!

Makes around 20 smaller scones. I’m making for a lot of people so you could use the same amount for fewer, larger scones.

Time to prep 10 mins plus 5 mins per child interruption

Ingredients

  • 100g diced ham
  • 150g grated cheese (I used parmesan and colby)
  • 1 tsp mustard powder
  • 1/2 tsp smoked cayenne pepper
  • 2 tbsp chia seeds (They go with everything, right?)
  • 80g butter
  • 400g self raising flour
  • 150 to 200ml milk

Method

  1. Usher the child outside to play so we can pop the oven on 180°C or 160°C if fan forced. It’s a nice day, she can get some vitamin D.
  2. In a large mixing bowl, put in your dry ingredients and mix. Spot child sneaking back in.
  3. Chop butter into cubes, make sure it’s room temperature to crumble and mix into dry ingredients. The child will certainly ask for/break/need something as soon as you have your hands covered in lumpy butter. Guaranteed.
  4. Despite having snacks and two drinks outside, that plan has failed and the child now wants what you’re making. Attempts to distract are futile so you rinse your hands only to turn around and find she’s gone back outside.
  5. Put your grated cheese(s) and ham into the mix. Kid may will smell this and insist on having some. Your previous snacks are evidently garbage and why does she have two incorrect drink vessels?! Obviously she needs the chipped Peter Rabbit one.
  6. Once negotiations are complete, for now, start adding the moo juice bit by bit while mixing. We have to call it that at the moment because she knows what milk is and will return to the ankle faster than a boomerang strapped with fireworks if she hears the ‘m’ word…
  7. Once you have a nice dough, remove from the bowl, throw some flour on the counter and kneed that bad boy. Take out any frustrations of the day. Please also take note, this is another messy bit so your toddler is duty bound to ask for something again. And again.
  8. Roll your dough out about 3cm thick, find a cookie cutter or whatever you’ve got handy and go to town. Empty the wine glass before you use it, if you don’t have cookie cutters…
  9. Pop on a lightly greased tray and into the oven for around 12 to 15 minutes. Child will want unnamed ones now they’re going in the oven so give in and hand her a bloody feijoa muffin.

A New Journey’s Path

Some eagle eyed amongst us may have noticed a slowly, slowly changing of the tides with the direction of ArtFoundHelen. It started on Instagram and shifted slowly over to FB and finally here, on WordPress.

So, Blue Tin Homestead is an all encompassing name for everything I do. From crafts to kid’s workshops, home grown to homestead.

ArtFoundHelen will still exist in creative form, it’ll be under the Blue Tin Homestead umbrella.

So why Blue Tin Homestead?

It’s literally what I’m known for in my local area. My home, my base, my wee nest is a blue tin home. It just seemed fitting to roll with the name of a place I love so much. Simple.